Free bird box plans
Bird Boxes
Bird boxes for your garden
Build a home for the birds you see around Sandbach Flashes. Each box comes with a cut list, exploded diagram and printable PDF plans — most can be made from a single plank of untreated timber.
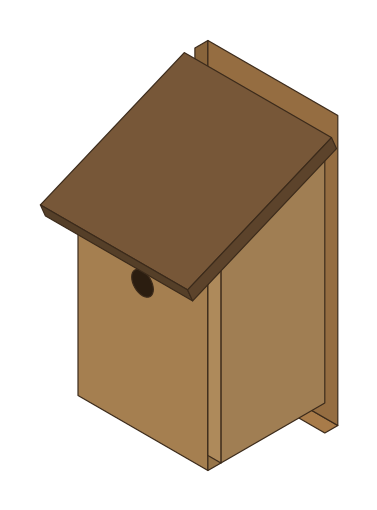
Blue Tit / Coal Tit Box
Blue tit, coal tit, marsh tit
A 25 mm hole keeps out house sparrows and great tits, giving blue tits exclusive use.
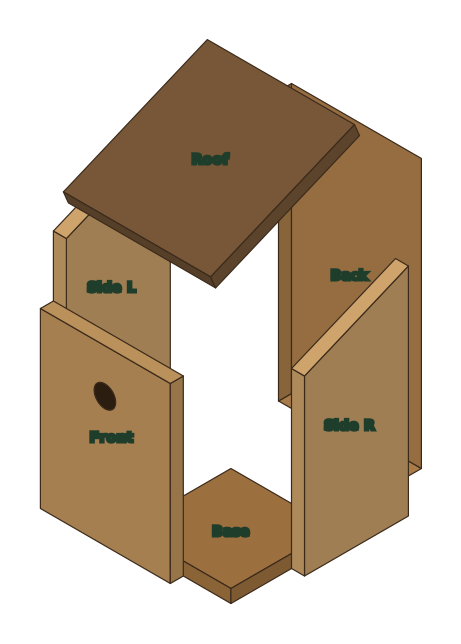 Open full size
Where & when
- Mount
- 1.5–3 m (5–10 ft) on a tree or wall
- Facing
- North to east, away from strong sun and prevailing wind
- When
- Put up by February; clean out Sept–Jan
Cut list (15 mm timber · plank 170 × 1340 mm)
| Part | Qty | W × L (mm) | Notes |
|---|---|---|---|
| Back | 1 | 150 × 310 | Extra length top & bottom for fixing |
| Front | 1 | 150 × 200 | 25 mm hole, centre 150 mm from bottom |
| Side | 2 | 120 × 250 | Tapers from 250 mm (back) to 200 mm (front) |
| Base | 1 | 120 × 120 | Drill 4 × 6 mm drainage holes; trim corners |
| Roof | 1 | 170 × 180 | Overhangs front to shed rain |
Step-by-step
- Mark out all pieces on one plank of rough-sawn untreated timber (15 mm softwood, or exterior plywood) using the cut list. Mark each piece's name in pencil.
- Cut the pieces. For the two sides, measure 250 mm on the back edge and 200 mm on the front edge and saw the slope between them.
- Drill the 25 mm entrance hole in the front panel with a hole saw or flat bit, centred about 50 mm below the top edge (at least 125 mm above the floor so chicks are safe from cats and woodpeckers). Do not add a perch — it helps predators.
- Drill four 6 mm drainage holes in the base and trim the corners slightly for extra drainage.
- Fix the sides to the back with 40 mm galvanised screws or ring-shank nails (pre-drill to avoid splitting), keeping the bottom edges flush 60 mm up from the bottom of the back.
- Fit the base between the sides, then fix the front.
- Fix the roof with a strip of rubber (old inner tube) or a brass hinge along the back edge, and a hook-and-eye catch at the side so you can clean the box out each autumn.
- Mount: 1.5–3 m (5–10 ft) on a tree or wall. Aspect: North to east, away from strong sun and prevailing wind. Tilt slightly forward so rain runs off the roof.
- Leave the wood untreated inside. If you treat the outside, use a water-based, wildlife-safe preservative and let it dry fully before putting up.
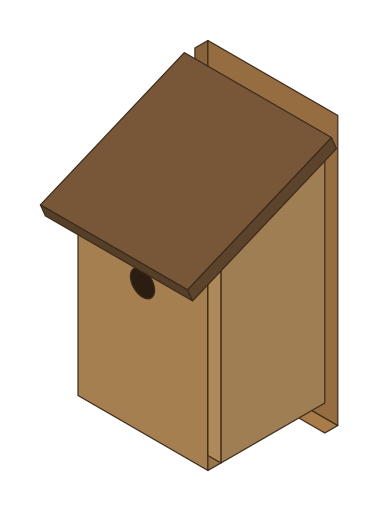
Great Tit Box
Great tit, nuthatch, tree sparrow
Nuthatches may plaster mud around the hole to shrink it — leave it be.
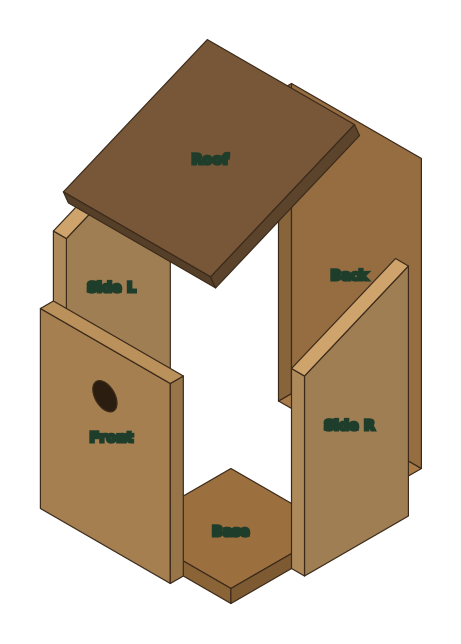 Open full size
Where & when
- Mount
- 1.5–3 m on a tree trunk
- Facing
- North to east
- When
- Put up by February
Cut list (15 mm timber · plank 170 × 1340 mm)
| Part | Qty | W × L (mm) | Notes |
|---|---|---|---|
| Back | 1 | 150 × 310 | Extra length top & bottom for fixing |
| Front | 1 | 150 × 200 | 28 mm hole, centre 150 mm from bottom |
| Side | 2 | 120 × 250 | Tapers from 250 mm (back) to 200 mm (front) |
| Base | 1 | 120 × 120 | Drill 4 × 6 mm drainage holes; trim corners |
| Roof | 1 | 170 × 180 | Overhangs front to shed rain |
Step-by-step
- Mark out all pieces on one plank of rough-sawn untreated timber (15 mm softwood, or exterior plywood) using the cut list. Mark each piece's name in pencil.
- Cut the pieces. For the two sides, measure 250 mm on the back edge and 200 mm on the front edge and saw the slope between them.
- Drill the 28 mm entrance hole in the front panel with a hole saw or flat bit, centred about 50 mm below the top edge (at least 125 mm above the floor so chicks are safe from cats and woodpeckers). Do not add a perch — it helps predators.
- Drill four 6 mm drainage holes in the base and trim the corners slightly for extra drainage.
- Fix the sides to the back with 40 mm galvanised screws or ring-shank nails (pre-drill to avoid splitting), keeping the bottom edges flush 60 mm up from the bottom of the back.
- Fit the base between the sides, then fix the front.
- Fix the roof with a strip of rubber (old inner tube) or a brass hinge along the back edge, and a hook-and-eye catch at the side so you can clean the box out each autumn.
- Mount: 1.5–3 m on a tree trunk. Aspect: North to east. Tilt slightly forward so rain runs off the roof.
- Leave the wood untreated inside. If you treat the outside, use a water-based, wildlife-safe preservative and let it dry fully before putting up.
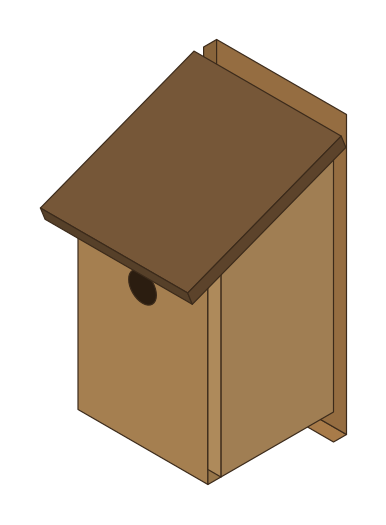
House Sparrow Box
House sparrow (colonial)
Sparrows nest in colonies — fit two or three boxes side by side or build a terrace.
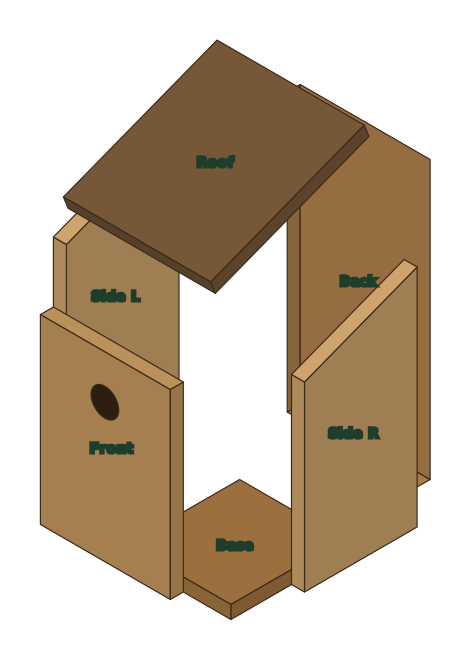 Open full size
Where & when
- Mount
- Under the eaves, at least 2 m high
- Facing
- North or east wall
- When
- Any time; sparrows prospect year-round
Cut list (15 mm timber · plank 170 × 1400 mm)
| Part | Qty | W × L (mm) | Notes |
|---|---|---|---|
| Back | 1 | 150 × 320 | Extra length top & bottom for fixing |
| Front | 1 | 150 × 210 | 32 mm hole, centre 160 mm from bottom |
| Side | 2 | 130 × 260 | Tapers from 260 mm (back) to 210 mm (front) |
| Base | 1 | 120 × 130 | Drill 4 × 6 mm drainage holes; trim corners |
| Roof | 1 | 170 × 190 | Overhangs front to shed rain |
Step-by-step
- Mark out all pieces on one plank of rough-sawn untreated timber (15 mm softwood, or exterior plywood) using the cut list. Mark each piece's name in pencil.
- Cut the pieces. For the two sides, measure 260 mm on the back edge and 210 mm on the front edge and saw the slope between them.
- Drill the 32 mm entrance hole in the front panel with a hole saw or flat bit, centred about 50 mm below the top edge (at least 125 mm above the floor so chicks are safe from cats and woodpeckers). Do not add a perch — it helps predators.
- Drill four 6 mm drainage holes in the base and trim the corners slightly for extra drainage.
- Fix the sides to the back with 40 mm galvanised screws or ring-shank nails (pre-drill to avoid splitting), keeping the bottom edges flush 60 mm up from the bottom of the back.
- Fit the base between the sides, then fix the front.
- Fix the roof with a strip of rubber (old inner tube) or a brass hinge along the back edge, and a hook-and-eye catch at the side so you can clean the box out each autumn.
- Mount: Under the eaves, at least 2 m high. Aspect: North or east wall. Tilt slightly forward so rain runs off the roof.
- Leave the wood untreated inside. If you treat the outside, use a water-based, wildlife-safe preservative and let it dry fully before putting up.
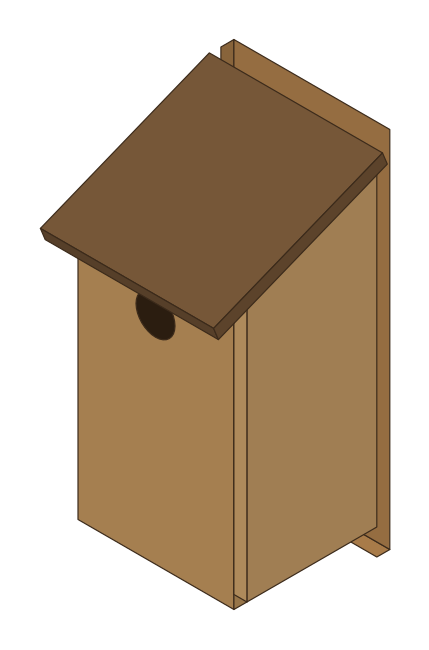
Starling Box
Starling, great spotted woodpecker
Use 18–20 mm timber for this larger box if you can; it insulates better.
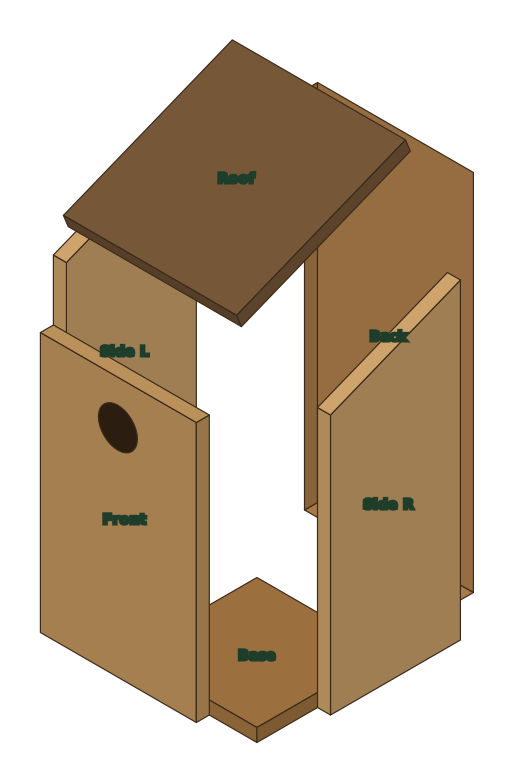 Open full size
Where & when
- Mount
- 2.5 m+ on a building or tree
- Facing
- North to east
- When
- Put up by February
Cut list (15 mm timber · plank 200 × 1830 mm)
| Part | Qty | W × L (mm) | Notes |
|---|---|---|---|
| Back | 1 | 180 × 420 | Extra length top & bottom for fixing |
| Front | 1 | 180 × 300 | 45 mm hole, centre 250 mm from bottom |
| Side | 2 | 150 × 360 | Tapers from 360 mm (back) to 300 mm (front) |
| Base | 1 | 150 × 150 | Drill 4 × 6 mm drainage holes; trim corners |
| Roof | 1 | 200 × 210 | Overhangs front to shed rain |
Step-by-step
- Mark out all pieces on one plank of rough-sawn untreated timber (15 mm softwood, or exterior plywood) using the cut list. Mark each piece's name in pencil.
- Cut the pieces. For the two sides, measure 360 mm on the back edge and 300 mm on the front edge and saw the slope between them.
- Drill the 45 mm entrance hole in the front panel with a hole saw or flat bit, centred about 50 mm below the top edge (at least 125 mm above the floor so chicks are safe from cats and woodpeckers). Do not add a perch — it helps predators.
- Drill four 6 mm drainage holes in the base and trim the corners slightly for extra drainage.
- Fix the sides to the back with 40 mm galvanised screws or ring-shank nails (pre-drill to avoid splitting), keeping the bottom edges flush 60 mm up from the bottom of the back.
- Fit the base between the sides, then fix the front.
- Fix the roof with a strip of rubber (old inner tube) or a brass hinge along the back edge, and a hook-and-eye catch at the side so you can clean the box out each autumn.
- Mount: 2.5 m+ on a building or tree. Aspect: North to east. Tilt slightly forward so rain runs off the roof.
- Leave the wood untreated inside. If you treat the outside, use a water-based, wildlife-safe preservative and let it dry fully before putting up.
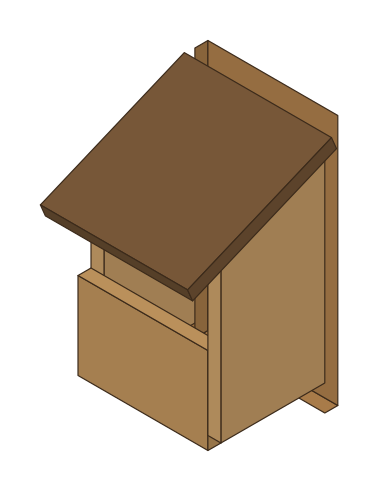
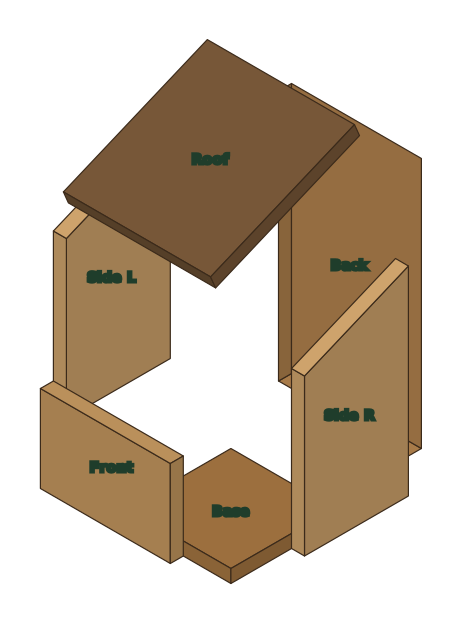
Robin Open-Fronted Box
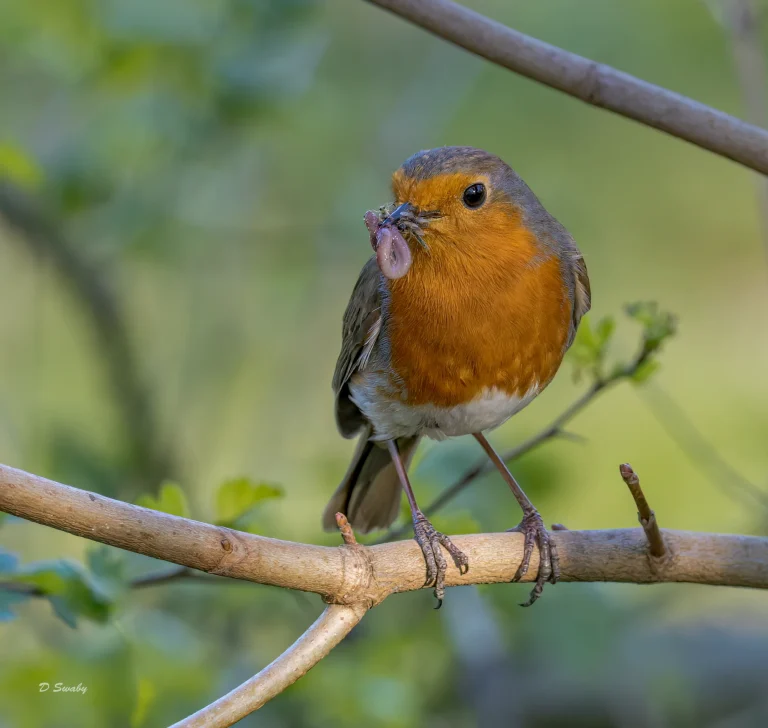
Robin, wren, pied wagtail
Concealment is everything — tuck it deep into vegetation, away from cat routes.
 Open full size
Where & when
- Mount
- Below 2 m, well hidden in ivy, climbers or a hedge
- Facing
- Sheltered, facing away from prevailing wind
- When
- Put up by February
Cut list (15 mm timber · plank 170 × 1180 mm)
| Part | Qty | W × L (mm) | Notes |
|---|---|---|---|
| Back | 1 | 150 × 290 | Extra length top & bottom for fixing |
| Front | 1 | 150 × 100 | Open front |
| Side | 2 | 120 × 230 | Tapers from 230 mm (back) to 180 mm (front) |
| Base | 1 | 120 × 120 | Drill 4 × 6 mm drainage holes; trim corners |
| Roof | 1 | 170 × 180 | Overhangs front to shed rain |
Step-by-step
- Mark out all pieces on one plank of rough-sawn untreated timber (15 mm softwood, or exterior plywood) using the cut list. Mark each piece's name in pencil.
- Cut the pieces. For the two sides, measure 230 mm on the back edge and 180 mm on the front edge and saw the slope between them.
- Leave the front at 100 mm high to create the open front.
- Drill four 6 mm drainage holes in the base and trim the corners slightly for extra drainage.
- Fix the sides to the back with 40 mm galvanised screws or ring-shank nails (pre-drill to avoid splitting), keeping the bottom edges flush 60 mm up from the bottom of the back.
- Fit the base between the sides, then fix the front.
- Fix the roof with a strip of rubber (old inner tube) or a brass hinge along the back edge, and a hook-and-eye catch at the side so you can clean the box out each autumn.
- Mount: Below 2 m, well hidden in ivy, climbers or a hedge. Aspect: Sheltered, facing away from prevailing wind. Tilt slightly forward so rain runs off the roof.
- Leave the wood untreated inside. If you treat the outside, use a water-based, wildlife-safe preservative and let it dry fully before putting up.
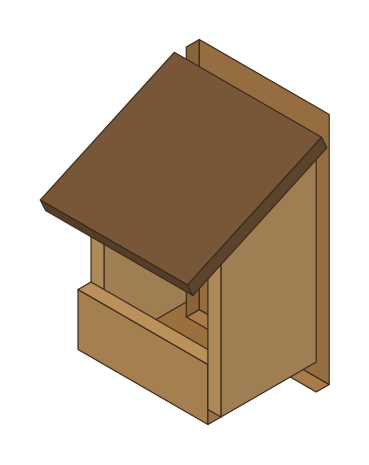
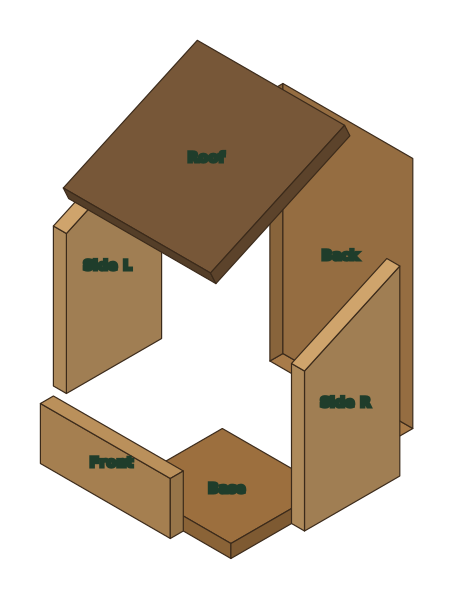
Spotted Flycatcher Box
Spotted flycatcher, robin
A low front lets the bird watch for insects from the nest; site near open lawn or water.
 Open full size
Where & when
- Mount
- 2–4 m on a wall or tree with a clear view out
- Facing
- Sheltered, with open flight space in front
- When
- Up by April — flycatchers arrive in May
Cut list (15 mm timber · plank 170 × 1060 mm)
| Part | Qty | W × L (mm) | Notes |
|---|---|---|---|
| Back | 1 | 150 × 270 | Extra length top & bottom for fixing |
| Front | 1 | 150 × 60 | Open front |
| Side | 2 | 110 × 210 | Tapers from 210 mm (back) to 160 mm (front) |
| Base | 1 | 120 × 110 | Drill 4 × 6 mm drainage holes; trim corners |
| Roof | 1 | 170 × 170 | Overhangs front to shed rain |
Step-by-step
- Mark out all pieces on one plank of rough-sawn untreated timber (15 mm softwood, or exterior plywood) using the cut list. Mark each piece's name in pencil.
- Cut the pieces. For the two sides, measure 210 mm on the back edge and 160 mm on the front edge and saw the slope between them.
- Leave the front at 60 mm high to create the open front.
- Drill four 6 mm drainage holes in the base and trim the corners slightly for extra drainage.
- Fix the sides to the back with 40 mm galvanised screws or ring-shank nails (pre-drill to avoid splitting), keeping the bottom edges flush 60 mm up from the bottom of the back.
- Fit the base between the sides, then fix the front.
- Fix the roof with a strip of rubber (old inner tube) or a brass hinge along the back edge, and a hook-and-eye catch at the side so you can clean the box out each autumn.
- Mount: 2–4 m on a wall or tree with a clear view out. Aspect: Sheltered, with open flight space in front. Tilt slightly forward so rain runs off the roof.
- Leave the wood untreated inside. If you treat the outside, use a water-based, wildlife-safe preservative and let it dry fully before putting up.
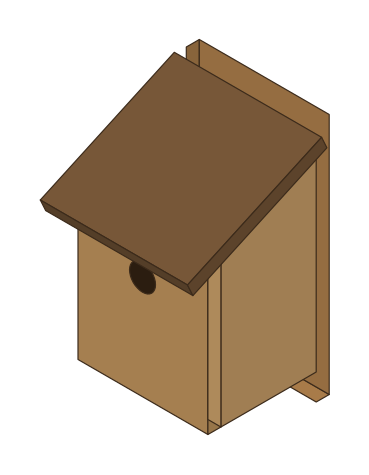
Wren Box
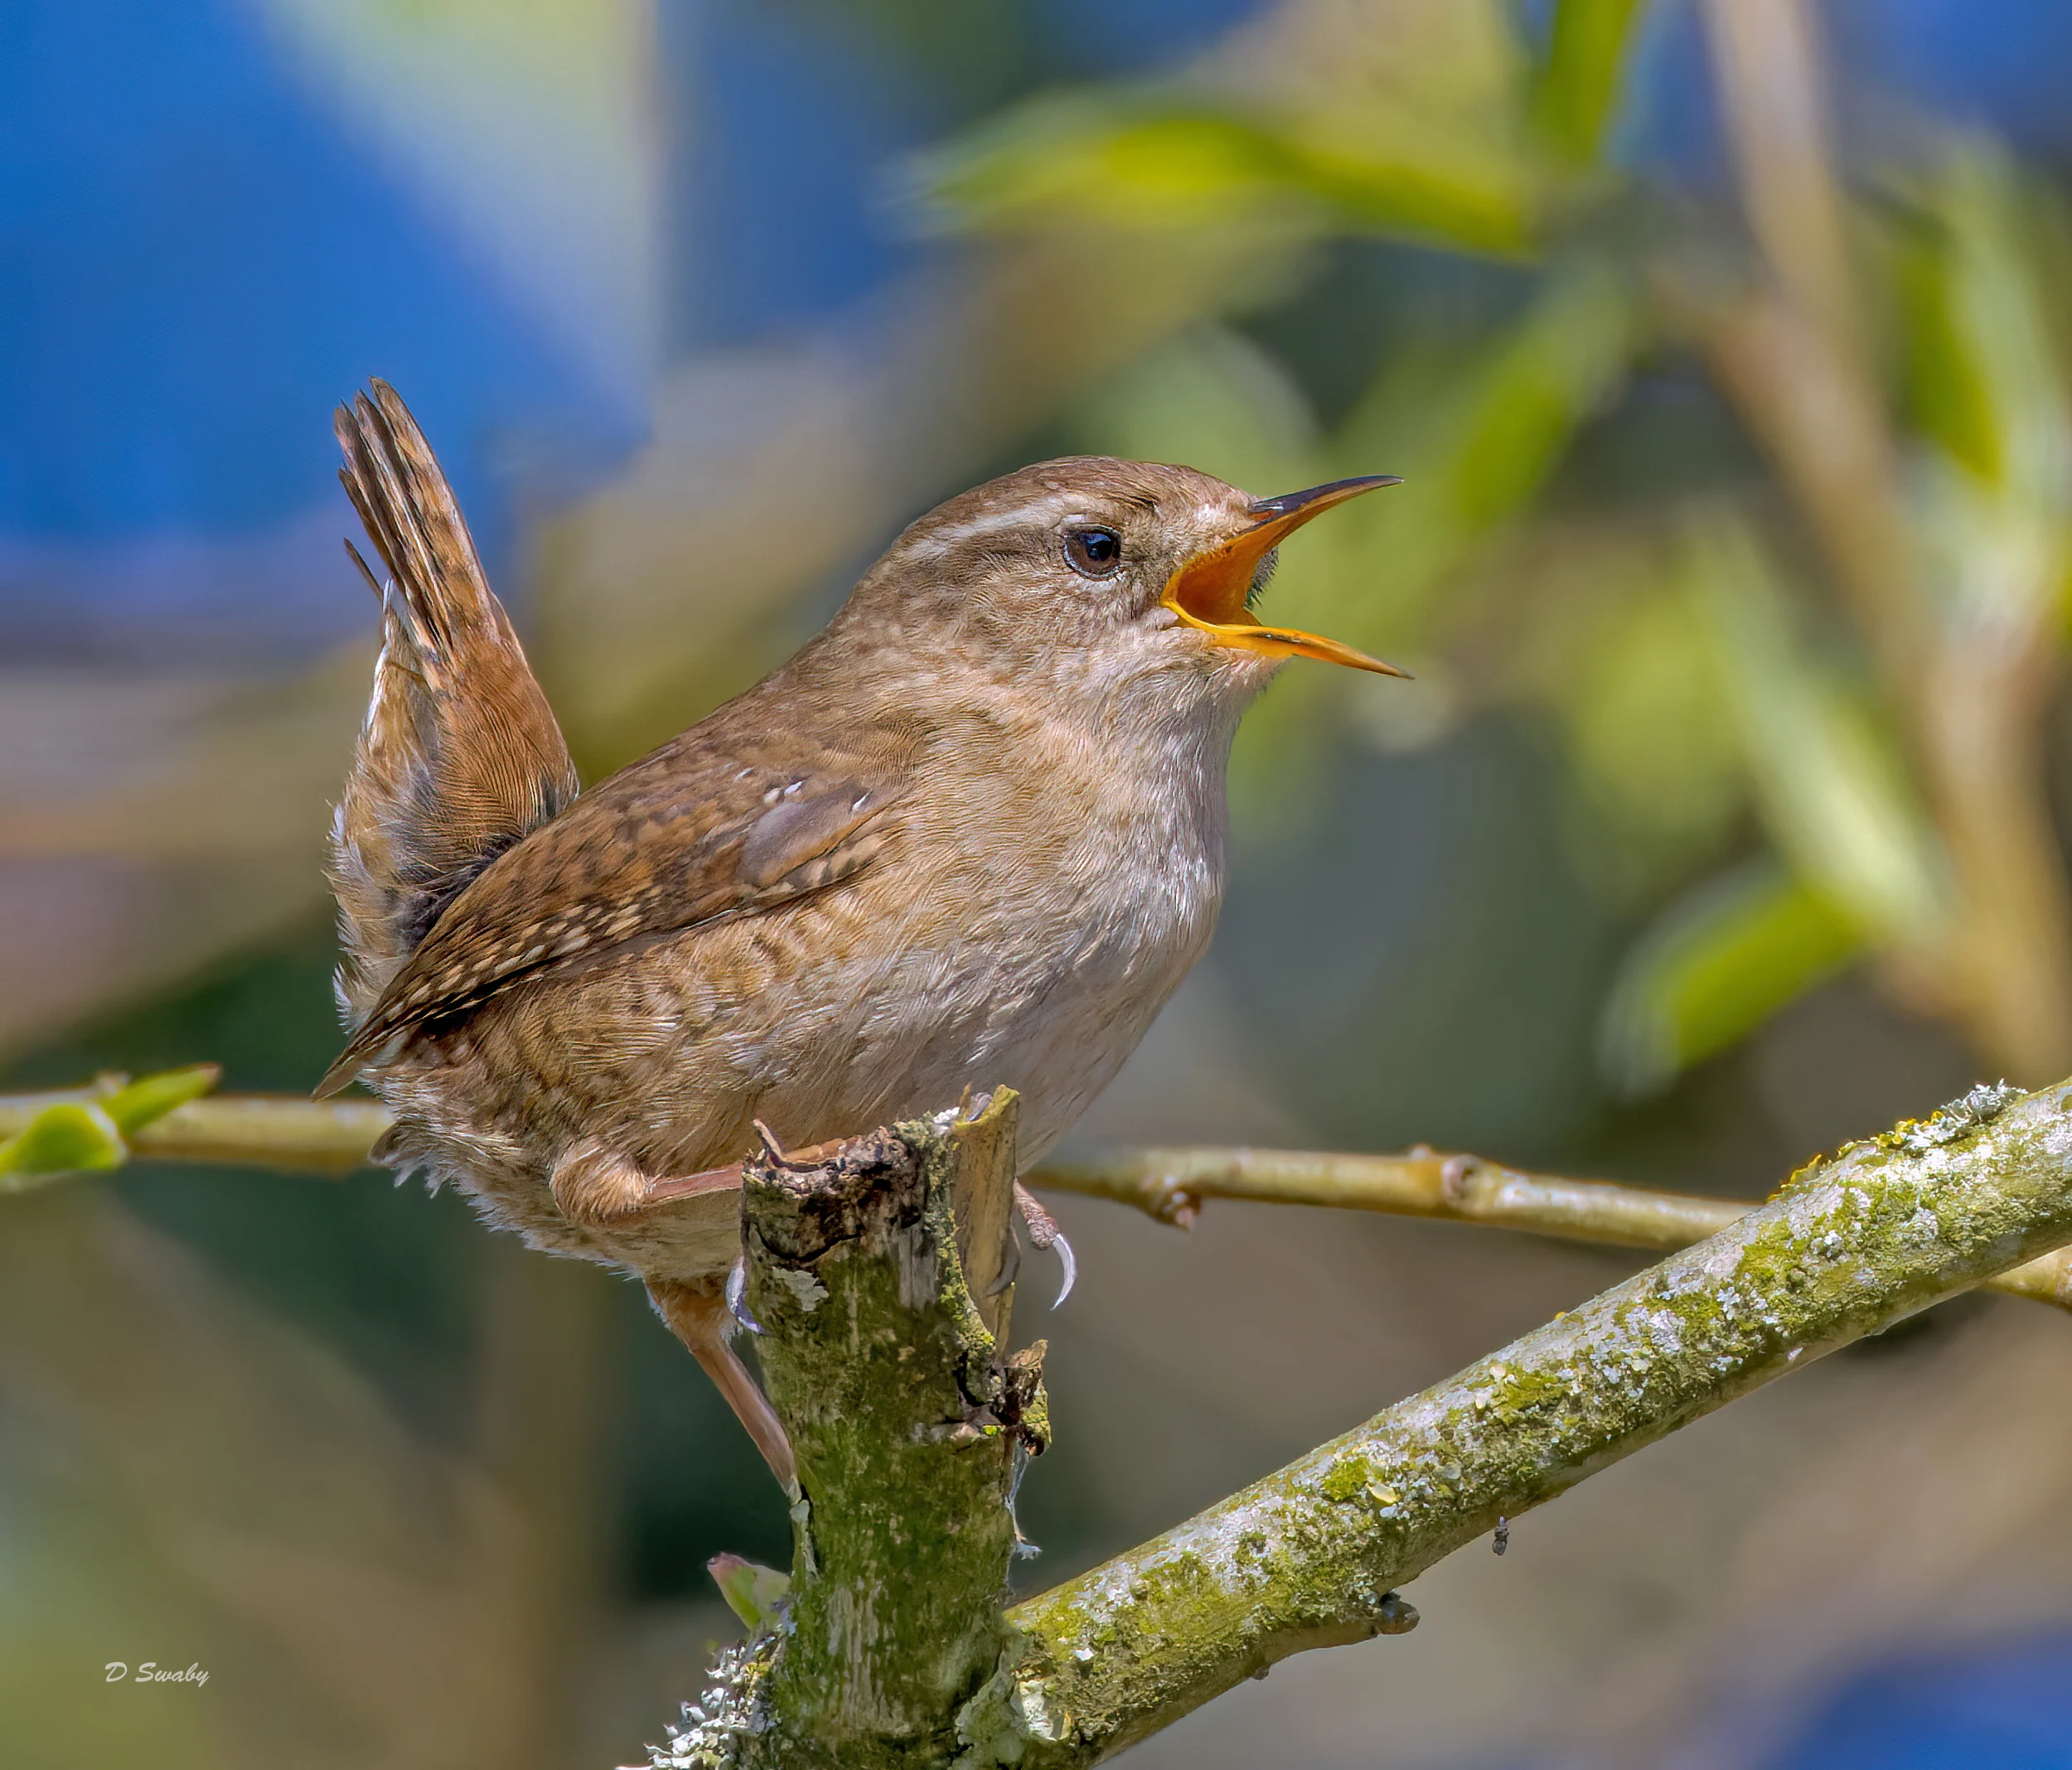
Wren
Wrens love roosting together in winter — a box near the Flashes reedbed edge suits them well.
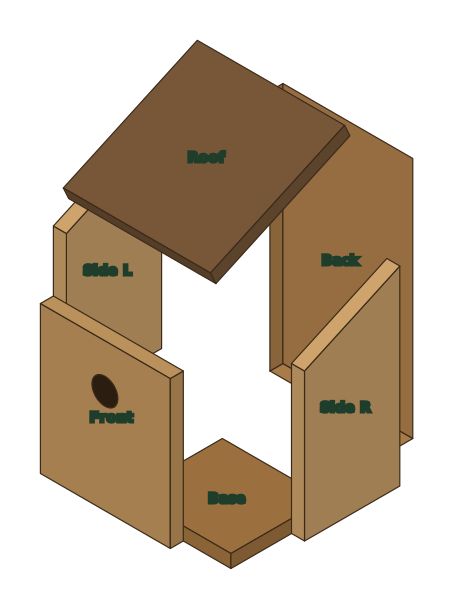 Open full size
Where & when
- Mount
- Under 2 m in dense cover
- Facing
- Any sheltered spot
- When
- Males build several nests in spring; also used as winter roosts
Cut list (15 mm timber · plank 170 × 1200 mm)
| Part | Qty | W × L (mm) | Notes |
|---|---|---|---|
| Back | 1 | 150 × 280 | Extra length top & bottom for fixing |
| Front | 1 | 150 × 170 | 30 mm hole, centre 120 mm from bottom |
| Side | 2 | 110 × 220 | Tapers from 220 mm (back) to 170 mm (front) |
| Base | 1 | 120 × 110 | Drill 4 × 6 mm drainage holes; trim corners |
| Roof | 1 | 170 × 170 | Overhangs front to shed rain |
Step-by-step
- Mark out all pieces on one plank of rough-sawn untreated timber (15 mm softwood, or exterior plywood) using the cut list. Mark each piece's name in pencil.
- Cut the pieces. For the two sides, measure 220 mm on the back edge and 170 mm on the front edge and saw the slope between them.
- Drill the 30 mm entrance hole in the front panel with a hole saw or flat bit, centred about 50 mm below the top edge (at least 125 mm above the floor so chicks are safe from cats and woodpeckers). Do not add a perch — it helps predators.
- Drill four 6 mm drainage holes in the base and trim the corners slightly for extra drainage.
- Fix the sides to the back with 40 mm galvanised screws or ring-shank nails (pre-drill to avoid splitting), keeping the bottom edges flush 60 mm up from the bottom of the back.
- Fit the base between the sides, then fix the front.
- Fix the roof with a strip of rubber (old inner tube) or a brass hinge along the back edge, and a hook-and-eye catch at the side so you can clean the box out each autumn.
- Mount: Under 2 m in dense cover. Aspect: Any sheltered spot. Tilt slightly forward so rain runs off the roof.
- Leave the wood untreated inside. If you treat the outside, use a water-based, wildlife-safe preservative and let it dry fully before putting up.
Never disturb an active nest — it is an offence under the Wildlife & Countryside Act 1981. Clean boxes out between September and January only.